YO Case Study July 2021

Ellie Bianchi – ST2 in Ophthalmology
Royal Surrey County Hospital, Guildford, U.K.

Hasan Naveed – ST5 in Ophthalmology
Royal Surrey County Hospital, Guildford, U.K.
A 72 year old Caucasian lady with a past medical history of rheumatoid arthritis on prednisolone and methotrexate presented with a 2-day history of pain and reduced vision in her left eye. She described finding fluid on her pillow when waking up in the mornings. She was known to the corneal clinic and was being followed up for monitoring of her peripheral corneal thinning, however had had a number of appointments cancelled and rescheduled due to the COVID-19 crisis.
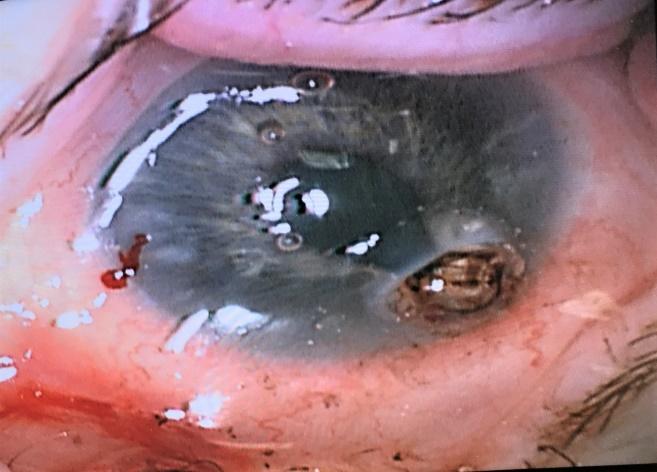
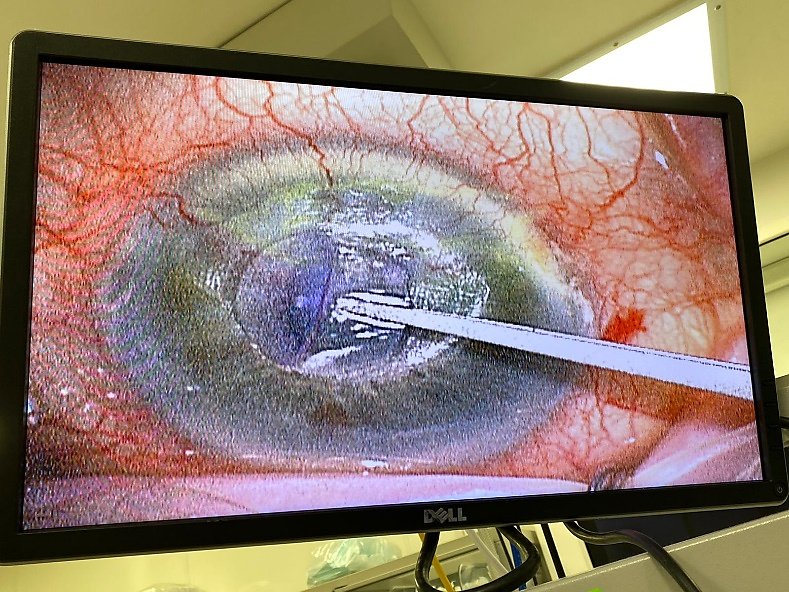
On examination she was found to have a large 3mm peripheral corneal perforation at the 4-5 o’clock position secondary to rheumatoid arthritis associated corneal melt. She had a shallow anterior chamber with significant iris prolapse and active leakage (Figure 1).
Figure 1: Corneal perforation with iris prolapse prior to repair
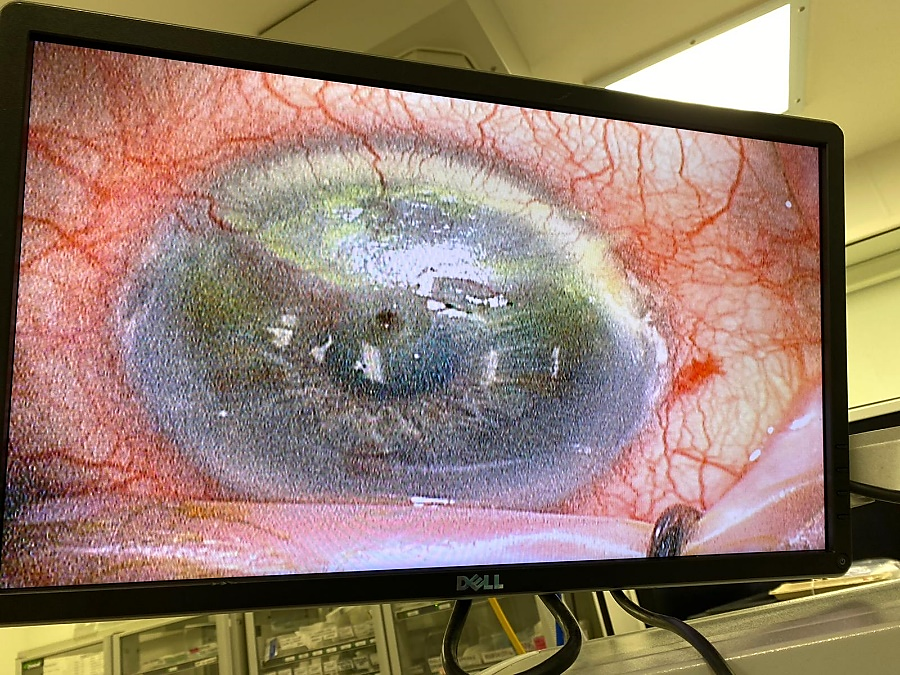
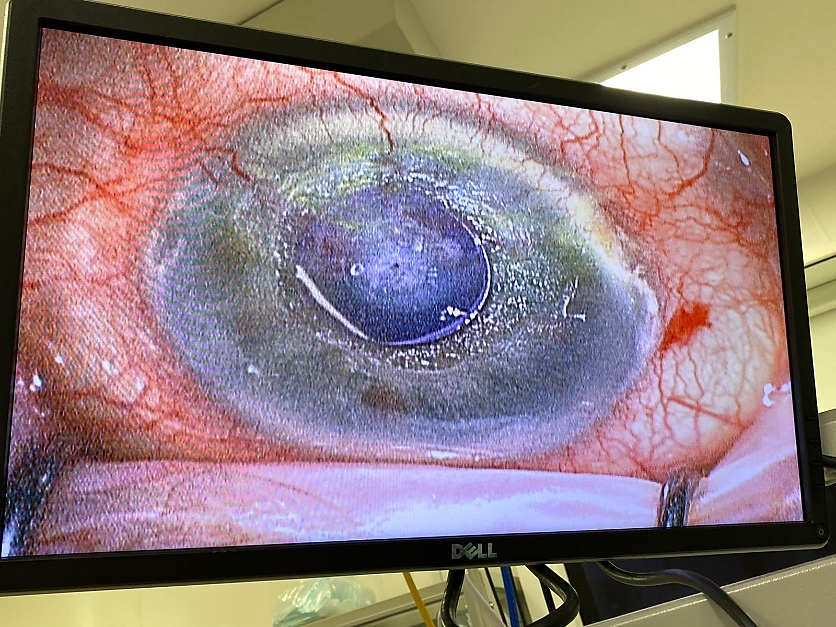
At a time when prompt accessibility to graft material was hard to come by, a decision was made to take her urgently to theatre and corneal gluing was carried out. The iris prolapse was managed with a combination of viscoelastic and iris retractor to free it from the perforated area. A skin biopsy punch was used to cut a small disc from the thin non-adhesive part of the surgical drape. The plastic end of a sponge was then moistened and used to pick the disc up, where a small drop of cyanoacrylate glue was placed onto it. The cornea was then dried, and the disc placed onto the perforated area to seal it. This had an excellent end-result with a deepened anterior chamber, round pupil and no evidence of leakage as shown in Figure 2. This allowed time for arrangements to be made for a long-term solution and she went on to have a graft some weeks later.
Figure 2: Corneal perforation following corneal gluing

Step-by-step to corneal gluing
To carry out corneal gluing the following are required:
- Cyanoacrylate glue
- A thin plastic surgical drape
- x2 Skin punch 2-5mm diameter (1 larger than the other)
- Cotton-tipped applicator or surgical sponge spear
- Bandage contact lens
Always start by assessing the corneal perforation; its size, location and degree of iris prolapse, prior to starting corneal gluing. This example shows a small central defect with minimal iris prolapse.
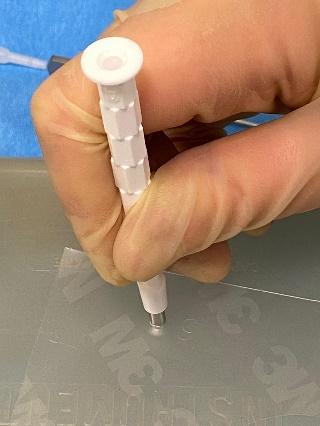

Ensure you have all instruments to hand prior to starting the procedure. Prepare 2-3 circular discs of surgical drape in two different sizes (here we have used 3mm and 5mm) using the skin punch on a hard surface. The size chosen will depend on the size of the perforation and its location.
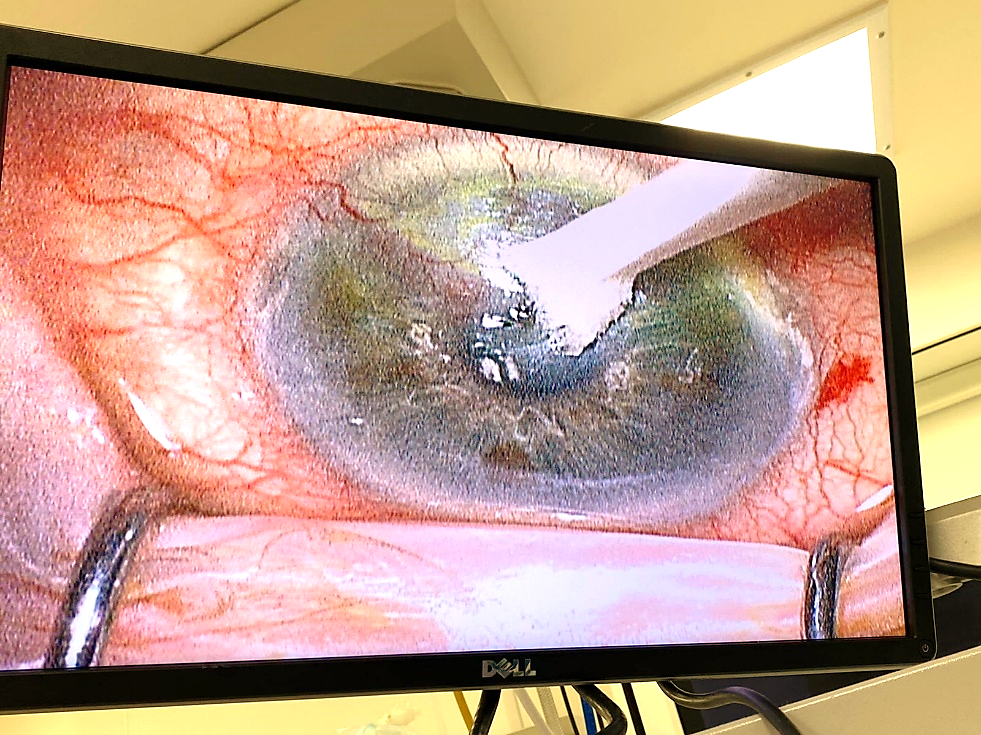
Use the surgical sponge to dry the cornea around the perforation and apply the smaller diameter plastic disc directly onto the defect.
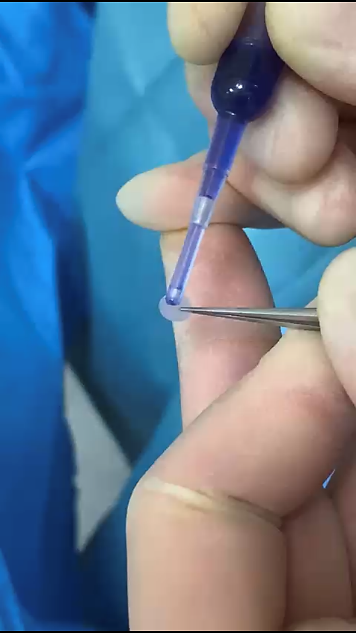
Apply a small amount of cyanoacrylate glue onto the larger diameter plastic disc and place this on top of the smaller disc already in situ.
Once both discs are in place and the glue has dried, make a small side port to reform the anterior chamber and check for any leaks. Place a bandage contact lens on top for patient comfort.
Note of thanks to Mr Dan Lindfield and Mr Mike Tappin, Consultant Ophthalmologists Royal Surrey County Hospital, Guildford, UK, in providing their guidance and teaching.


